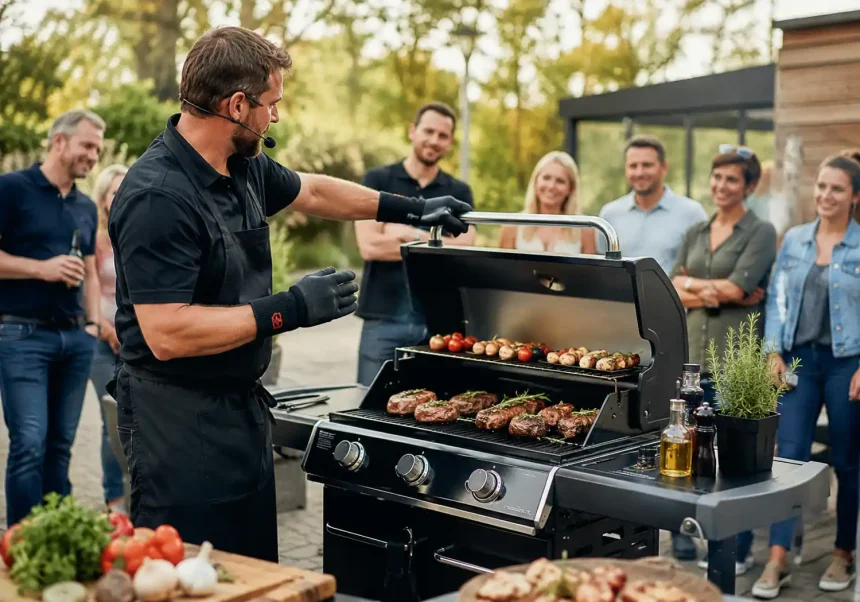
Why a Weber Grillvorführung Is Worth Your Time
A Weber grill demonstration is more than a sales event—it’s a hands-on learning session where technique meets taste. Whether you’re a first-time griller or a seasoned pitmaster switching models, a live demo accelerates your learning curve, reveals small technique tweaks that deliver huge flavor gains, and helps you choose the right Weber model for your cooking style.
What You’ll Typically Learn in a Demo
- Heat management on gas, charcoal, and pellet grills
- Lid discipline and how convection inside the kettle actually works
- Smart thermometers and probe placement for precise doneness
- Direct vs. indirect zones and when to use each
- Cleaning, seasoning grates, and long-term maintenance
Choosing the Right Weber Grill Before the Demo
Arriving with a short list makes a demo far more useful. Think about fuel type, capacity, and features you’ll realistically use.
Fuel Type: Flavor, Control, and Convenience
- Gas (Genesis, Spirit): Quick start, steady temps, great for weeknights
- Charcoal (Kettle, Master-Touch): Signature sear and smoke complexity
- Pellet (SmokeFire): Wood-fired flavor with app-based control
- Electric (Pulse): Balcony-friendly, consistent heat
Size and Cooking Area
- 2–3 burners or 22″ kettle for couples and small patios
- 3–4 burners or 26″ kettle for families
- XL gas grills or larger kettles for entertaining and multiple zones
Features That Matter
- Integrated sear burners for steakhouse crusts
- Rotisserie compatibility for self-basting roasts
- Gourmet BBQ System grates for wok, pizza stone, or griddle inserts
- Bluetooth/Wi‑Fi thermometers for stress-free monitoring
Mastering Heat: The Core Skill of Any Weber Grillvorführung
Great grilling is heat choreography. Demos spotlight how to build and control zones so food cooks evenly and tastes better.
Direct vs. Indirect Setup
- Direct heat: Fast searing of steaks, burgers, kebabs
- Indirect heat: Roasts, whole chicken, ribs, delicate fish fillets
On a kettle, bank coals to one side for a two-zone fire. On gas, turn one burner to high for searing and keep adjacent burners on medium-low for finishing.
The 2-Zone and 3-Zone Methods
- 2-Zone: One hot, one cool—most versatile everyday setup
- 3-Zone: Hot, medium, cool—adds flexibility for thick cuts and reverse searing
Lid On, Flavor On
Lid-down cooking transforms your grill into a convection oven. Expect more even cooking, faster times, fewer flare-ups, and richer smoke character. In a demo, note how instructors time lid lifts—only when flipping or probing.
Temperature Targets You’ll Hear at a Weber Grillvorführung
Precise doneness is repeatable when you use a probe thermometer and rest meat properly.
Quick Reference Internal Temps
- Chicken breast: 160–165°F (71–74°C)
- Chicken thighs: 175–185°F (79–85°C)
- Pork chops: 140–145°F (60–63°C)
- Salmon: 120–125°F (49–52°C)
- Steak (strip/ribeye):
- Rare: 120–125°F (49–52°C)
- Medium-rare: 130–135°F (54–57°C)
- Medium: 140–145°F (60–63°C)
Resting and Carryover
Pull proteins 3–5°F (2–3°C) before your target. Tent loosely with foil and rest:
- Steaks/chops: 5–8 minutes
- Poultry/roasts: 10–20 minutes depending on size
Flavor Building at a Grillvorführung: Smoke, Sear, and Seasoning
Weber demos excel at showing how little tweaks create big flavor.
Smart Seasoning
- Salt early: 45–60 minutes before for steaks and chops to dry-brine
- Use coarse kosher salt and freshly cracked pepper for better crust
- For poultry, add baking powder to rub for crispier skin
Searing Strategies
- Pat meat dry and preheat grates 10–15 minutes
- Use the sear zone or cast-iron insert for a deep Maillard crust
- Flip only when a clean release occurs; don’t pry
Smoke Layers on Any Weber
- Charcoal: Add a few wood chunks to the hot zone; control vents for thin blue smoke
- Gas: Use a smoker box with soaked chips or a foil pouch over a lit burner
- Pellet: Choose wood varieties (apple for pork, hickory for beef) and run clean, steady temps
Signature Techniques You’ll See Demoed
Small upgrades in technique that consistently impress at a Weber Grillvorführung.
Reverse Sear
- Cook thick steaks at 225–275°F (107–135°C) indirect to 10°F (6°C) below target, rest briefly, then sear hot for 60–90 seconds per side.
Rotisserie Mastery
- Truss poultry for even rotation, balance the load, and place a drip pan beneath. Run at 325–375°F (163–190°C) until thigh hits 175–180°F (79–82°C).
50/50 Burgers that Wow
- 50% brisket, 50% chuck, coarse grind. Form loose 6–7 oz patties, chill, season heavily, sear direct, finish indirect to 130–135°F (54–57°C).
Crispy-Skinned Salmon
- Brush with oil, season, start skin-side down over medium heat. Don’t flip until the edges render and skin releases cleanly; finish indirect if needed.
Setup and Safety During a Weber Grillvorführung
Good prep equals good results—both at the demo and at home.
Preheat and Prep
- Preheat 10–15 minutes; aim for clean, shiny grates
- Oil the food, not the grates, to reduce flare-ups
- Keep a cool zone ready for flare-up management
Tools and Must-Haves
- Instant-read thermometer and heatproof gloves
- Long tongs, spatula, grill brush, and paper towels
- Drip pans for indirect cooks and rotisserie sessions
Safety Basics
- Place grills on stable, ventilated surfaces away from overhangs
- Keep a spray bottle for small flare-ups; a fire extinguisher for emergencies
- Never leave a lit grill unattended; mind children and pets
Cleaning and Maintenance the Weber Way
A clean grill cooks better and lasts longer—something you’ll see emphasized in any quality Weber Grillvorführung.
After Each Cook
- Run the grill hot for 10 minutes to burn off residue
- Brush grates while warm; empty ash catchers when cool
- Wipe exterior with mild soapy water to protect finishes
Seasonal Deep Clean
- Remove and soak grates and Flavorizer bars
- Scrape burner tubes and check for even flames on gas models
- Inspect gaskets, probes, and rotisserie hardware; replace as needed
Making the Most of Your Visit
Turn a Weber Grillvorführung into a personal masterclass.
Smart Questions to Ask
- Which cuts best showcase this model’s strengths?
- How does this grill handle low-and-slow vs. high-heat searing?
- What accessories genuinely improve results versus nice-to-haves?
Try Before You Buy
- Feel lid balance, thermometer placement, and shelf sturdiness
- Practice creating zones, inserting probes, and using the grease management system
Sample Menu for Your First Weekend After the Demo
- Starters: Grilled romaine with lemon-parmesan dressing
- Mains: Reverse-seared ribeyes; rotisserie chicken with herb butter
- Sides: Charred asparagus; smashed potatoes on the griddle insert
- Dessert: Caramelized pineapple rings with vanilla-lime syrup
Final Thoughts: Confidence You Can Taste
A great Weber Grillvorführung replaces guesswork with know-how. Focus on heat control, doneness, and a few flavor-building techniques, and you’ll come away ready to serve food that tastes as good as it looks—every single time.
For more articles visit vents magazine.