Screen recording has become an invaluable tool for individuals and businesses alike, enabling them to capture and share visual content from their computer screens. Whether you need to create video tutorials, record online meetings, or demonstrate software usage, screen recording software offers a seamless solution. In this article, we will explore the various aspects of screen recording on PC, including downloading the software, utilizing its features, troubleshooting common issues, and more.
Different Methods to Download Screen Recording Software on PC
Before diving into the process of screen recording, it’s essential to select the right software for your needs. Several options are available, ranging from free to premium versions. Let’s take a closer look at these methods:
1. Free Screen Recording Software
There are numerous free screen recording applications available on the internet. These tools offer basic recording features without any cost. Some popular free options include OBS Studio, ShareX, and Screencast-O-Matic. While they might lack advanced functionalities, they are a great starting point for beginners.
2. Premium Screen Recording Software
For more comprehensive features and professional-grade recording, premium screen recording software is worth considering. Programs like Camtasia, Snagit, and Bandicam offer advanced editing capabilities, enhanced video quality, and additional export options. They often come with a trial period, allowing users to test their suitability before making a purchase.
Step-by-Step Guide: Downloading and Installing Screen Recording Software
Now that you have decided on the type of скачать запись экрана на пк software you want, let’s go through the step-by-step process of downloading and installing it on your PC:
- Research and Choose the Software: Conduct thorough research on the available options, considering factors like ease of use, features, and user reviews. Once you have made your choice, proceed with downloading the software from its official website.
- Check System Requirements: Before downloading, ensure that your computer meets the software’s minimum system requirements. This information is usually available on the software’s website.
- Download the Software: Click on the download link provided on the software’s website, and the installation file will begin to download.
- Install the Software: Once the download is complete, locate the installation file and double-click it to begin the installation process. Follow the on-screen instructions to install the software on your PC.
- Launch the Software: After installation, launch the screen recording software from your desktop or the Start menu.
- Explore the Interface: Familiarize yourself with the software’s interface and options. Some software might require you to adjust settings before starting a recording.
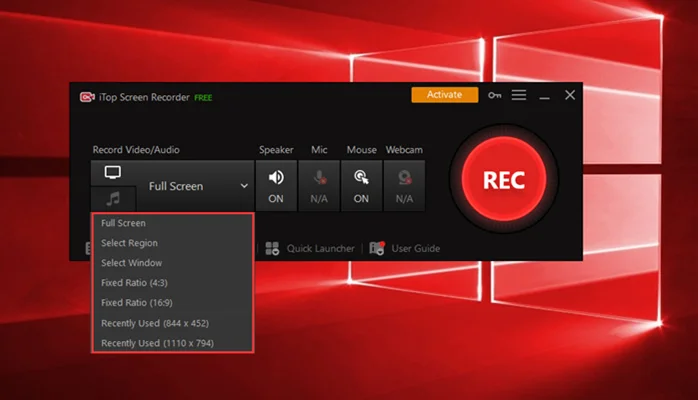
- Select Recording Area: Determine the area of your screen that you want to record. Most software allows you to choose between recording the entire screen or a specific region.
- Configure Audio Settings: If your screen recording requires audio, ensure that the software is set to capture audio from your microphone or system audio.
- Start Recording: Click the “Record” button to initiate the screen recording. Perform the actions you want to capture, and the software will record the screen accordingly.
- Stop and Save Recording: Once you have finished recording, click the “Stop” or “Finish” button, depending on the software. Save the recording to your desired location on your computer.
Exploring the Features of Screen Recording Software
Screen recording software comes with a variety of features that enhance the recording experience and allow users to create polished videos. Let’s explore some of the key features commonly found in screen recording applications:
1. Customizable Recording Area
Most screen recording software allows users to choose the specific area of their screen they want to record. This flexibility is particularly useful when you want to focus on a specific application or a particular section of your screen.
2. Audio Capture
Screen recording is not limited to visuals; it also captures audio. Users can choose to record system audio, microphone audio, or both. This feature is essential for narrating tutorials, creating podcasts, or recording online meetings.
3. Annotation Tools
Annotation tools empower users to add text, arrows, shapes, and highlights to their recordings. These tools are handy for emphasizing specific points or providing visual cues to the audience.
4. Video Editing
While some basic screen recording software only captures raw footage, more advanced options offer built-in video editing capabilities. Users can trim, cut, and merge recordings, add transitions, and overlay visual elements.
5. Export Options
Screen recording software allows users to export their recordings in various formats, such as MP4, AVI, or GIF. The ability to export in different formats ensures compatibility with various devices and platforms.
Understanding Screen Recording Formats and Quality
When recording your screen, it’s crucial to choose the appropriate format and quality settings to achieve the desired output. Let’s explore the different screen recording formats and considerations regarding recording quality:
1. Screen Recording Formats
Screen recording software often provides multiple formats for saving recorded videos. Some common formats include:
- MP4: A widely-used format that offers good quality and compatibility with most devices.
- AVI: Known for its high-quality output but can result in large file sizes.
- GIF: Suitable for short recordings or creating animated demonstrations.
Each format has its advantages and disadvantages, so it’s essential to select the one that best suits your needs.
2. Recording Quality
The recording quality affects the clarity and detail of your screen recording. Higher quality settings result in larger file sizes but offer sharper visuals, while lower quality settings reduce file sizes but may lead to a loss of detail. Consider the purpose of your recording and the platform where it will be shared to determine the optimal recording quality.
Best Practices for Effective Screen Recording
To create engaging and professional screen recordings, consider the following best practices:
1. Plan Your Content
Before hitting the record button, outline what you want to cover in your screen recording. A clear plan will help you stay focused and deliver your message more effectively.
2. Organize Your Desktop
Ensure that your desktop is clutter-free and organized before starting the recording. Close unnecessary applications and files to avoid distractions.
3. Use a Quality Microphone
If your screen recording involves narration or audio commentary, invest in a good quality microphone to ensure clear and crisp audio.
4. Keep it Concise
Avoid rambling and keep your recordings concise. Viewers are more likely to stay engaged if the content is to the point and well-structured.
5. Utilize Keyboard Shortcuts
Familiarize yourself with keyboard shortcuts in your screen recording software. These shortcuts can streamline the recording process and save time.
6. Preview Your Recording
Before sharing your recording, watch it in its entirety to check for any errors or areas that need improvement. This step ensures that your final video meets your expectations.
Utilizing Screen Recording for Productivity and Creativity
Screen recording is not limited to educational purposes; it can significantly boost productivity and creativity. Here are some innovative ways to use screen recording:
1. Remote Collaboration
When working with remote teams, screen recording can be an excellent tool for collaboration. Record video messages to explain complex ideas or demonstrate processes visually.
2. Bug Reporting and Troubleshooting
For software developers and IT professionals, screen recording helps in documenting and reporting bugs and issues efficiently.
3. Content Creation
Screen recording can be a powerful tool for content creators. Use it to create software tutorials, product demos, or walkthroughs of your website or app.
4. Online Learning
Educators and online course creators can leverage screen recording to create engaging and interactive lessons for their students.
5. Game Streaming
For gamers, screen recording software is essential for streaming gameplay or creating highlight reels for their audience.
Troubleshooting Common Screen Recording Issues
While screen recording is a straightforward process, users may encounter some common issues along the way. Here are solutions to address these problems:
1. Low Frame Rate
If your recording appears choppy or laggy, try reducing the recording resolution or closing unnecessary applications to free up system resources.
2. Audio Sync Issues
In some cases, the audio in your recording may not sync properly with the visuals. Ensure that you are using the correct audio settings in your screen recording software.
3. Recording Glitches
If you encounter glitches or artifacts in your recording, consider updating your screen recording software or adjusting the recording settings.
4. Large File Sizes
If your recorded file sizes are too large, try compressing the video or using a different recording format.
5. Black Screen Recording
If your screen recording results in a black screen, ensure that you are selecting the correct recording area and that your recording software has the necessary permissions to capture your screen.
Editing and Enhancing Screen Recordings
After capturing your screen recording, you might want to edit and enhance it to improve its overall quality. While basic screen recording software may not offer extensive editing capabilities, dedicated video editing tools can help you refine your recordings. Here are some common editing tasks:
- Trimming and Cutting: Remove any unwanted sections from your recording to keep the content concise and focused.
- Adding Captions and Subtitles: Enhance accessibility by adding captions or subtitles to your video.
- Overlaying Visuals: Overlay visual elements like images, logos, or additional video clips to make your recording more engaging.
- Applying Transitions: Smoothly transition between different sections of your video with various transition effects.
- Adjusting Audio: Fine-tune the audio levels and remove background noise for a better listening experience.
Remember that the extent of editing required depends on the purpose of your screen recording. For simple tutorials, minimal editing may be sufficient, while more complex projects may require extensive post-production.
Sharing and Exporting Screen Recordings
Once you have created and edited your screen recording, it’s time to share it with your audience. Here are several ways to do that:
1. Uploading to Video Platforms
You can upload your screen recordings to popular video-sharing platforms like YouTube, Vimeo, or Dailymotion. These platforms offer a broad audience reach and allow you to embed videos on websites or share them on social media.
2. Sharing via Cloud Storage
Use cloud storage services like Google Drive or Dropbox to share large video files with others. These services offer easy sharing options and allow others to download the recording directly.
3. Sending Direct Links
If your recording is for a specific audience or a closed group, you can send direct links to the video file via email or messaging apps.
4. Embedding in Presentations
For professional presentations, you can embed your screen recording directly into your slides to provide visual demonstrations.
5. Hosting on Your Website
If you have a website or blog, consider hosting your screen recordings there to keep your content centralized and accessible to your audience.
Remember to consider the privacy and permissions of your audience when sharing screen recordings. Some content may require password protection or limited access to specific viewers.
Screen Recording Ethics and Legal Considerations
While screen recording is a powerful tool, it’s essential to use it responsibly and ethically. Here are some ethical considerations and legal aspects to keep in mind:
1. Respect Copyright and Intellectual Property
Do not use screen recording software to record copyrighted materials or content without proper authorization. Respect the intellectual property rights of others.
2. Obtain Consent for Personal Information
If your screen recording involves personal information or sensitive data of others, ensure you have their consent before recording and sharing.
3. Consider Fair Use
Understand fair use principles when using screen recording for educational or critical purposes. Always attribute and cite the original source if applicable.
4. Protect Private Information
Avoid recording sensitive or private information without explicit consent, as it may lead to privacy violations and legal issues.
5. Comply with Applicable Laws
Be aware of local laws and regulations regarding screen recording, especially when recording communications or interactions with others.
Future Trends in Screen Recording Technology
The world of screen recording is continually evolving, and advancements in technology will likely shape its future. Here are some exciting trends to look forward to:
1. Improved Compression and File Formats
Advancements in video compression technology will lead to smaller file sizes without compromising video quality.
2. Cloud-Based Recording Solutions
Cloud-based screen recording solutions will offer more flexibility and convenience, allowing users to record and access videos from any device.
3. Augmented Reality Screen Recording
The integration of augmented reality in screen recording will enable more immersive and interactive demonstrations.
4. AI-Powered Editing
Artificial intelligence will play a significant role in automating video editing tasks, making the post-production process more efficient.
5. Real-Time Collaboration
Screen recording tools will facilitate real-time collaboration, enabling multiple users to record and edit content simultaneously.
Conclusion
Screen recording on PC is a valuable resource for individuals and businesses looking to communicate ideas, demonstrate processes, and share knowledge effectively. With the right software and knowledge of best practices, anyone can create compelling and engaging screen recordings for various purposes.
Remember to choose the appropriate software for your needs, explore its features, and optimize recording settings to achieve the best results. Always prioritize ethical and legal considerations when using screen recording, and respect the intellectual property of others.
So, what are you waiting for? Download screen recording software on your PC and start creating captivating videos to share with the world!

