
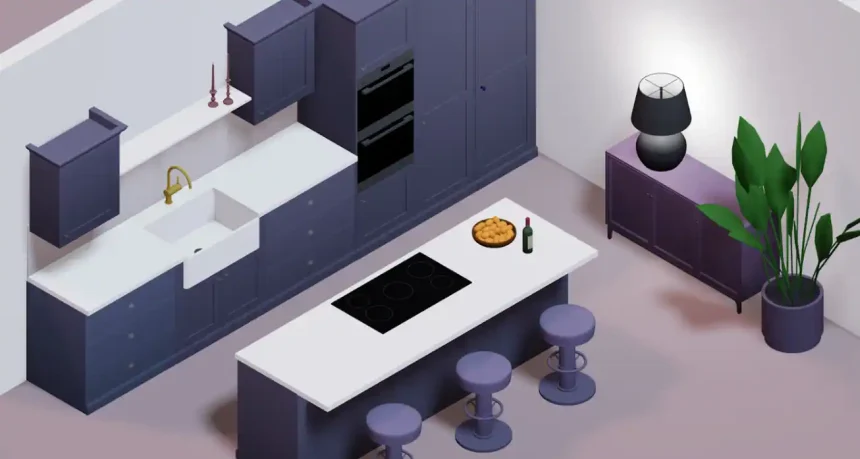
The kitchen is the undisputed heart of the modern home. It has transcended its purely utilitarian origins to become a dynamic hub for connection, creativity, and memory-making. It’s where we gather for morning coffee, where children do their homework, where friends congregate during parties, and where the day’s stories are shared over a meal.
This evolution from a simple cooking space to a multifunctional family nexus means the demands on its design have grown exponentially. Yet, for many, this central space is a source of daily friction.
The experience of a poorly designed kitchen is a universal frustration: the cramped workflow that turns cooking into a clumsy dance, the constant bumping into family members, the perpetual lack of usable counter space, and the inefficient, step-wasting journey between the refrigerator, sink, and stove. This is a space that works against its inhabitants, creating stress where there should be joy.
The transformation from a frustrating kitchen to a dream kitchen, however, is not an unattainable luxury reserved for a select few. This guide serves as a comprehensive roadmap for that journey, transforming a space of frustration into one that flows in perfect harmony with your life.
Modern technology acts as the great democratizer of design, providing the tools to bridge the gap between a personal vision and a buildable, functional reality. With the right approach and the right digital tools, anyone can orchestrate this transformation, moving from abstract ideas to a concrete, beautiful, and highly efficient plan.
The Foundation of Flow: From Abstract Frustration to a Concrete Plan
Before a single cabinet is chosen or a countertop material is considered, the foundation of a truly great kitchen must be laid. This foundation is built on a deep understanding of how a space is used, the scientific principles of ergonomic design, and the non-negotiable rules of spatial planning.
This section deconstructs these core concepts, providing the “why” behind every design decision and empowering you to create a plan that is not just aesthetically pleasing, but profoundly functional.
Deconstructing Your Current Reality: An Audit of Your Space
The first step in any successful transformation is a candid assessment of the current reality. This involves becoming an anthropologist in your own kitchen. For a few days, pay close attention to the daily routines and patterns that unfold within the space.
This self-audit should document the kitchen’s pain points. Where do traffic jams consistently occur, especially when more than one person is in the room? Which tasks feel awkward or inefficient? Observe the path taken to make a simple breakfast or prepare a complex dinner. Note the number of steps required to move from the refrigerator to a prep surface and then to the sink. Is there a constant search for utensils or a specific pot?
How many people typically use the kitchen at the same time, and what activities are they engaged in? This process of identifying specific bottlenecks and mapping movement patterns makes the need for a new design personal and tangible, transforming vague frustrations into a clear list of problems to be solved.
The Science of an Effortless Kitchen: From Triangles to Zones
For nearly a century, kitchen design has been guided by ergonomic principles aimed at maximizing efficiency and minimizing wasted effort. These principles have evolved significantly, mirroring the changes in our lifestyles and how we interact with this vital space.
The Classic Work Triangle
The foundational concept in kitchen ergonomics is the “kitchen work triangle.” Developed between the 1920s and 1940s through the pioneering work of industrial psychologist Lillian Moller Gilbreth and subsequent research at the University of Illinois School of Architecture, this principle was rooted in time-motion studies designed to optimize productivity.
The concept identifies the three primary work centers in a kitchen—the refrigerator (food storage), the sink (cleaning and preparation), and the stove (cooking)—and arranges them as the three points of a triangle. The goal was to create an efficient workflow for a single cook within a compact, utilitarian kitchen, reducing the number of steps required to complete tasks.
To be effective, the work triangle adheres to specific geometric rules established by design authorities like the National Kitchen & Bath Association (NKBA):
- Each leg of the triangle should measure between 4 feet (1.2 m) and 9 feet (2.7 m). A distance shorter than 4 feet creates a cramped, congested workspace, while a distance longer than 9 feet requires excessive walking and makes cooking inefficient.
- The paths between the three points should be clear of major obstructions. No cabinets, islands, or peninsulas should intrude more than 12 inches (30 cm) into a leg of the triangle, and major household traffic patterns should not flow through it.
The Modern Evolution to Work Zones
While the work triangle remains a valuable guideline, its limitations have become apparent in the context of the modern home. The principle was conceived for a smaller, enclosed kitchen used by a single person. Today’s kitchens are often larger, open-concept spaces that serve as social hubs for multiple cooks, family members, and guests.
This fundamental shift in the kitchen’s role from a solitary “workshop” to a social “hub” has dramatically increased its functional complexity. A design principle optimized for one person cannot efficiently serve many simultaneous activities.
Rather than focusing on just three points, this model organizes the kitchen around distinct activity centers. This allows for multiple people to work on different tasks concurrently without getting in each other’s way. The five core zones of the modern kitchen are:
- The Prep Zone: This is the primary food preparation area. It requires a significant, uninterrupted span of countertop space—ideally at least 36 inches wide—and should be located near the sink for washing ingredients. Storage for cutting boards, knives, mixing bowls, and small appliances should be integrated here.
- The Cooking Zone: Centered around the range, cooktop, and oven, this zone should have clear landing areas on either side for hot pots and pans. Storage for cooking utensils, spices, pots, and bakeware should be immediately accessible.
- The Cleaning Zone: To streamline cleanup, the dishwasher should be located within 36 inches of the sink. Integrated bins for trash and recycling are also essential components of this zone.
- The Consumables Storage Zone: This includes the refrigerator and the food pantry. For maximum convenience, this zone is often best placed near the kitchen’s entrance, allowing for easy unloading of groceries without having to traverse the entire space.
- The Non-Consumables Storage Zone: This zone is for storing everyday dishes, glassware, and cutlery. It is most logically placed near the cleaning zone (dishwasher) for easy unloading, and adjacent to the dining or serving area for efficient table setting.
This evolution from a simple triangle to a multi-layered system of zones highlights a critical point: planning a modern kitchen requires a tool capable of managing this new level of complexity. A simple 2D sketch is insufficient for visualizing overlapping traffic flows and the interplay between multiple users. The ability to model and experience these zones in three dimensions becomes a necessity, not a luxury.
The Rules of Space: Essential Dimensions for Safety and Comfort
Beyond the flow of work, a successful kitchen design must adhere to a set of standardized dimensions that ensure safety, comfort, and accessibility. These guidelines, largely established and promoted by the National Kitchen & Bath Association (NKBA), are the bedrock upon which creative design is built.
They are not meant to stifle creativity but to provide a functional framework that guarantees the final space is genuinely livable. Integrating these non-negotiable numbers into a plan from the outset prevents costly and frustrating real-world errors.
The following table distills the most critical of these architectural standards into a single, practical reference guide. These dimensions represent the collective wisdom of decades of design experience and should be treated as a checklist during the planning process.
| Guideline | Recommended Dimension | Rationale & Source Snippets |
| Work Aisle Width (1 Cook) | Minimum 42 inches (107 cm) | Ensures safe movement and allows appliance doors (oven, dishwasher, refrigerator) to be opened without completely blocking the pathway. |
| Work Aisle Width (2+ Cooks) | Minimum 48 inches (122 cm) | Prevents congestion and allows two people to work back-to-back or pass each other comfortably without disrupting tasks. |
| Walkway Clearance | Minimum 36 inches (91 cm) | Provides a comfortable path for household traffic passing through the kitchen without interfering with active work areas. |
| Island/Peninsula Clearance | Minimum 42-48 inches (107−122 cm) | Critical for maintaining clear traffic flow around the island and ensuring appliance doors can open fully without obstruction. |
| Refrigerator Landing Area | Minimum 15 inches (38 cm) | Provides a dedicated spot on the handle side of the refrigerator to set down groceries before loading or items being taken out. |
| Sink Landing Area | Minimum 24 inches (61 cm) on one side, 18 inches (46 cm) on the other | Accommodates a dish rack for drying on one side and provides a clear prep area for items to be washed on the other. |
| Cooktop Landing Area | Minimum 12 inches (30 cm) on the one side, 15 inches (38 cm) on the other | Creates a safe, heat-resistant zone to place hot pan handles, lids, and cooking ingredients without cluttering the cooking surface. |
| Seating Knee Space (at 36-inch high counter) | Minimum 15 inches (38 cm) deep | Allows for comfortable seating at an island or peninsula without diners’ knees hitting the cabinet back. |
Your Digital Blueprint: A Step-by-Step Guide in Arcadium 3D
With a firm grasp of the foundational principles of flow and space, the next stage is to translate this knowledge into a tangible plan. This is where the power of modern 3D design tools becomes indispensable. They provide a risk-free environment to experiment, refine, and perfect a layout before committing to any real-world changes.
Arcadium 3D is a powerful solution that addresses the challenges of modern kitchen design. It is entirely browser-based, eliminating the need for complex software downloads, and features an intuitive interface that is praised by DIY home renovators for its simplicity and by professional architects and designers for its speed and precision. This step-by-step guide will walk through the process of building a dream kitchen blueprint using this versatile platform.
Step 1: Mapping Your Canvas (The Digital Twin)
The design process begins by creating an accurate digital replica of the existing space. This “digital twin” serves as the canvas for all subsequent design work. The first action is to meticulously measure the physical room, documenting wall lengths, ceiling height, and the precise locations and dimensions of all existing elements like windows, doors, and structural posts.
It is also critical to note the placement of unmovable infrastructure, such as plumbing lines for the sink and gas or high-voltage electrical outlets for the stove. Within Arcadium 3D, this information is used to map the space. The platform’s intuitive controls make this process straightforward. Walls can be drawn and then adjusted to exact lengths using parametric inputs, ensuring millimetre-perfect accuracy.
A standout feature is the way the software handles openings; dragging and dropping windows and doors from the library onto a wall automatically creates the necessary cutouts, a significant time-saver compared to traditional modeling software. This initial step, which can be completed in minutes, establishes a dimensionally accurate foundation for the entire project.
Step 2: Building the Ergonomic Core (Applying the Zone Theory)
With the digital canvas prepared, the next step is to apply the work zone theory. This is where the kitchen’s functional skeleton is built. Using Arcadium 3D’s extensive library of pre-built, scalable 3D models, the primary components are placed within the room. This includes base cabinets, tall cabinets for pantries and ovens, and the “big three” appliances: the sink, stove, and refrigerator.
The process involves strategically positioning these elements to create the distinct work zones discussed earlier. One can experiment with various classic layouts—such as L-shaped, U-shaped, or galley kitchens—to see how they fit the space and facilitate flow. The best way to test these layouts is to experiment visually.
With a free kitchen design tool, one can move elements around in a photorealistic 3D space, instantly seeing how a U-shaped layout feels compared to an L-shaped one. This process of rapid iteration is where the perfect flow for unique needs is discovered. The drag-and-drop functionality allows for effortless reconfiguration, making it easy to test dozens of possibilities and refine the placement of each zone for optimal ergonomics.
Step 3: Defining Worksurfaces and Social Hubs (The Island)
Once the core cabinet and appliance layout is established, the focus shifts to the worksurfaces that tie them together. In Arcadium 3D, countertops can be added using the versatile “shapes” tool, which allows for the creation of custom surfaces that perfectly fit the cabinet layout. This is also the stage where the kitchen island or peninsula—the modern kitchen’s social and functional hub—is designed.
This step reveals a powerful synergy between functional rules and creative expression. While 2025 design trends point towards exciting new forms like islands with soft, curved edges , these creative ambitions must coexist with the rigid functional guidelines for clearances.
A common challenge for a DIY designer is figuring out how to create a beautiful curved island without violating the 48-inch clearance required for a two-cook kitchen. This is where a sophisticated tool demonstrates its true value.
One can creatively shape an island and instantly verify with the dimensioning tools that all necessary clearances are maintained, preventing a costly and frustrating real-world mistake. The tool acts as a real-time validator, ensuring that every creative decision is grounded in functional reality.
Step 4: Illuminating Your Vision (Layered Lighting)
Lighting is one of the most critical yet often overlooked elements of kitchen design.
- Ambient Lighting: This is the general, overall illumination for the room, often provided by ceiling-mounted fixtures or recessed lights.
- Task Lighting: This is focused, brighter light directed at specific work areas. Under-cabinet lighting is the most common and effective form of task lighting, illuminating countertops for safe and efficient food prep.
- Accent Lighting: Pendant lights over an island, lighting inside glass-front cabinets, or a backlit backsplash are all examples of accent lighting.
Arcadium 3D’s built-in lighting library and environmental controls allow for the simulation of a comprehensive lighting plan. Users can add various fixtures, from pendants to spotlights, and adjust their brightness and even the overall ambient light to mimic different times of day.
This feature is consistently highlighted as a key differentiator because it allows one to see how lighting will affect the feel of the space, ensuring the final kitchen is bright, welcoming, and highly functional.
Step 5: Infusing Personality (Finishes, Colors, and Trends)
The final step in the digital design process is to breathe life and personality into the structural model. This is where the functional blueprint is transformed into a unique reflection of personal style. This is the perfect opportunity to experiment with the latest design trends.
The all-white kitchen is giving way to more expressive and personal palettes. Popular kitchen trends for 2025 include the use of warm, earthy neutrals like sage green and taupe, as well as bold, dramatic jewel tones like emerald green and deep navy. There is also a strong movement towards the richness of medium-to-dark wood tones for cabinetry, which adds warmth and character.
Other key trends include the use of dramatic, full-height stone slab backsplashes that match the countertops and the sophisticated layering of mixed metals for hardware, faucets, and light fixtures. Arcadium 3D’s extensive libraries of materials, colors, and finishes make it easy to explore these ideas.
One can “paint” cabinets with a click, swap countertop materials from marble to quartzite, and change the finish on cabinet pulls from brass to polished nickel in seconds. Wondering if sage green cabinets will work with a dark wood island? Try it instantly. This ability to visualize and compare different aesthetic choices is how a truly personalized and confident design is achieved.
Your Dream Kitchen Is a Click Away
The journey from a frustrating, inefficient kitchen to the functional and beautiful heart of a home is a profound transformation. This guide has charted that path, moving from an audit of an existing space, through the fundamental principles of ergonomic science, to the step-by-step creation of a complete, personalized 3D model.
The process demonstrates that exceptional design is not a matter of chance, but a product of thoughtful planning and powerful tools. The power to design a space that is beautiful, functional, and deeply personal is no longer locked behind the barriers of expensive software or years of technical training.
It is accessible, intuitive, and, most importantly, an enjoyable and empowering process. By leveraging the principles of good design and the capabilities of modern technology, anyone can move from dreaming about a better kitchen to actively designing one.
The kitchen of your dreams isn’t just a fantasy in a magazine. It’s a space waiting to be designed, a plan waiting to be built. The principles are clear, the tools are ready, and the first step of the transformation is yours to take.

